Thursday, December 12, 2013

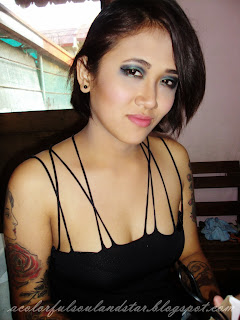
Christmas Make Up Look

Hey! So, it's has been almost a month since my last blog post. December is here and a lot of girls/women are going to Christmas parties. Usually, we go to salons and have our make up done. This year, why not try to do your own make up? On this post, I'm going to show you how to get an elegant Christmas look. Let's get started!

1. Always start with a clean face. If you don't like using toners, just make sure you washed your face before applying anything on it. 

2. For this look, I didn't use my Pond's moisturizer. I just used Maybelline Clear Smooth 8-in-1 Skin Transformer in 01 Fresh. This product claims to moisturize the skin for 24H and protect with SPF 26 / PA+++ (whatever that means..). The first photo shows that 01 Fresh is too light for me. I dabbed my face with tissue to remove some of the cream. Set with powder.

3. Fill in your brows. Outline your brows first, then blend. Make sure that the inner end of your brows are lighter than the rest. This will give you a more natural look. Tons of practice will help you perfect your eyebrows or you can always purchase an eyebrow stencil.

4. Apply (a) on you eyelids. This color is  from Wet n' Wild Color Icon Palette in Blue Had Me At Hello.

5. Apply (b) on the outer third of your eyelid. I used e.l.f. Studio Endless Eyes Pro 100 Eyeshadow Palette (#71605). Make sure to blend (b) with (a).

6. On the outer v of your eyelid, dab (c). Since I have small eyes, I need to make my eyes look bigger and this color will help me achieve that. (c) is also from e.l.f. Studio Endless Eyes Pro 100 Eyeshadow Palette (#71605). BLEND!

7. Line your upper and lower (outer half) lashline with a metallic blue eyeliner.  I used Sephora Contour Eye Pencil 12HR wear in My Boyfriend's Jeans.

8. To add sparkle on the eyes, I applied (d) on the outer part of my lids. Use your fingers and gently dab it on. Using an eyeliner brush, add this color to the inner half of your lower lashline and to the inner corners of your eyes. Product used is Sephora Moonshadow Trio in Bermuda Triangle N7.

9. Contour the cheeks, nose, jawline and temples. Added my blush-on after contouring.

10. Curl lashes and apply mascara. After applying some mascara, get a spooley brush or an eyebrow comb and run it through the lashes. This will separate the lashes and make them look natural.

11. Apply nude or red lipstick. TIPS when applying lipstick: 
- Use a lipliner. If you have an uneven lipcolor, try lining and filling in your lips using your lipliner before applying your lipstick. 
- For precise application, use a lipbrush. 

There you have it. I hope this tutorial has been helpful and I hope you all like this look. If you have any questions, suggestions and requests, please feel free to send me a message. Thanks!

Happy holidays! :)

-Tel

Friday, November 15, 2013

LOL (Lots of Love) Liquid Foundation Review

Hey guys! For this post, I will be talking about LOL or Lots of Love liquid foundation. If I am not mistaken, LOL is a sister company of BYS (Be Yourself) which came from Australia. LOL was made available in the Philippines recently and you can purchase them from SM Department Stores and Watson's. It is imported but this make up line is really cheap. Prices start at P99! 

When I was in SM Southmall, I came across their stall in the department store. I must say, the stall was really small. If I didn't know the brand, I wouldn't look at it. The stall was sooooo plain. They better do something about their marketing plan or else, this product will not last long in the Philippines. Products are cheap but no one was looking at them.

Okay.. So enough about my rants. Let's start! 

This is what the packaging looks like. Very simple. This is in 03 Sand Beige. As you can see, a 35ml container only costs P139! BTW, they have light and medium shades and 03 Sand Beige is the darkest. INGREDIENTS: Aqua, Glycerin, Ethylhexyl Palmitate, Isododecane, Butylene Glycol, Ethylhexyl Methoxycinnamate, Dimethiconce, Cyclopentasiloxane, Laureth-4, Laureth-7, Steareth-21, Disteardimonium Hectorite, Silica, Phenoxyethanol, Methylparaben and Propylparaben.
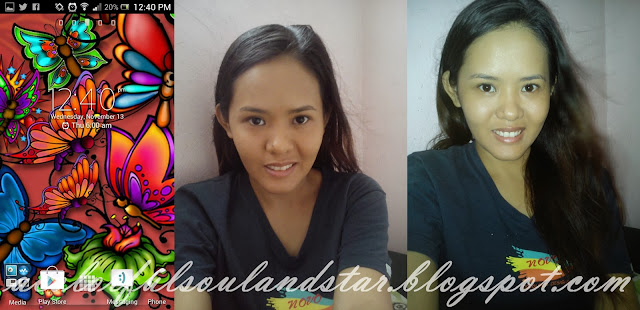
No foundation, yet. I only have moisturizer (matte finish) on my face.
I finished applying the foundation at 12:40 PM. I used my MakeUpByToni Flat Top Kabuki Brush and set it with my Maybelline Shine Free All-in-One powder (Sand Beige). I chose to apply powder after the foundation because it felt very oily. The foundation covered some of my dark spots and pimple marks. This product provides medium coverage. You will still need to use a concealer to hide other marks that were not covered by the foundation.
At 2:44 PM, my face became very oily. The oilyness is not very visible on the second and third photo but in person, it really felt and looked very oily. On the third photo, I did not retouch... I just used Clean & Clear Oil Control film to remove excess oil.
4:48 PM, face is very oily (again!) and I don't even look like I still have foundation on. Please excuse the dry lips. :)

PROs:
1. Very cheap. For the price I paid for, the quality is just right. You can't expect much from a product this cheap. (This can count as a CON, as well)
2. Doesn't cake.
3. Gives medium coverage.
4. Even though it made my face oily, my skin felt very soft and smooth.
5. Doesn't smell bad. It smells like any other regular make up.
6. Not messy. No worries of product spills.

CONs:
1. You need a lot of the product to cover the whole face.
2. Gives you an oily face. Make sure that you have powder and oil film in your purse when using this product.
3. It's hard to blend. 

Will I buy it, again? Not really sure about that. Will I recommend this? If you are into the dewy make up look, then use this product. If not, don't even think of purchasing this. 

-Tel

Saturday, November 2, 2013

First Ever Client!

It has been awhile since my last post. I'm just so excited to share with everyone that I was finally to do a hair and make up service! Yey! It was for free but I still consider her as my first client because she was going to an event in EGS. She's also my sister-in-law, so I didn't think that it's right to ask her to pay me. This post is not a tutorial. This is just about my first ever hair and make up gig.

A day before the event, I asked her if she wanted light or dark make up. Since, she was dressing up as a witch, she picked the latter. I will not be saying a lot on this post. I will just be posting a lot of her pictures here. I am very happy with the results and I hope everyone can share my happiness. Here are the pictures:
Before (I think she only has matte moisturizer on her face)

Applying foundation.


Shaping her brows.


Applying eyeshadow. Blending and smudging.

Done with the eyes!


Nose contouring.

Done with contouring and blush!


Finished with her hair.


Added stars on her temple for the Kat Von 'D and flirty witch effect.


Photo c/o Valerie Tolentino-Zamora

Photo c/o Valerie Tolentino-Zamora

Photo c/o Valerie Tolentino-Zamora

Photo c/o Valerie Tolentino-Zamora
There you have it. My first client attending their halloween event in EGS-Northgate.

I am praying that I will have more clients and for God to bless me with more knowledge in this path that I am taking.

If you have comments or request, please send me a message here or on Facebook. Thanks!


-Tel

Tuesday, October 15, 2013

Beauty Queen Make Up Look

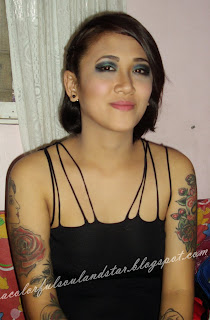
Lately, I've been practicing almost everyday to master the art of putting on make up. I've loved and hated my work on myself a lot of times but never did I think of quitting. I want to be a Make Up Artist (MUA) and I believe that practicing and continuously learning will help me succeed in this field. Beauty gurus on YouTube are feeding me with a lot of new techniques and I am very thankful that they created their channels. The things I learn from them, I apply on myself or if there's a willing model, I practice on them. Yesterday, I was very lucky to have my husband's cousin agree to being my model for the day. Her name is Alexandra Zabala.

When I started putting make up on her, I really didn't know what look I was going for. As in, no idea! So, I just chose colors from my make up palette and started. It took me an hour to finish her make up. Spent a lot of time on her eyes. To this day, this look is the most beautiful work I have done. I think the look I achieve was a beauty pageant sort of make up. This girl can be a beauty queen. Just look at her! She has the beauty, brains and heart of a real beauty queen. 


If you want to recreate her look, here's a list of what I used on her:
1. Pond's White Beauty Detox (not in photo)
2. Nichido Beauty Cake in Mocha
3. Careline Concealer in Almond
4. Shawill Two Way Eyebrow Palette in 001
5. ELF 100-pc Eyeshadow Palette
6. Nichido Extra Waterproof Eye Pencil in Black
7. Lancome Paris Mascara
8. ELF Cool Bronzer
9. Shawill Blush in Candy Red
10. Color Design Lipstick in J303
11. Maybelline Clear Smooth All in One (Sand Beige)


The colors I used from my ELF palette are mostly in the shades of brown and blue. Please accept my apologies for not being able to take pictures on how I applied the colors and exactly what colors I used. Another lesson learned from being a blogger.  Don't worry, I'll never commit that mistake again. This blogger will remember that pictures and detailed instructions are important in this type of entry. :)
If you have requests, comments and suggestions, please do not hesitate to contact me via Google+ or Facebook.


- Tel